
By Chelsie Calliham
Video use on social media is on the rise. Marketers and businesses owners use videos and ads to increase engagement and views, but why does it seem like you’re seeing more videos in your Newsfeed than before?
On April 6, 2016, Facebook launched Facebook Live, a live video streaming service that lets anyone broadcast from their mobile devices or computers directly to their Facebook Newsfeed. The development gives anyone the opportunity to capture followers’ attention via live video from your home or office, and the potential to reach millions of people around the world.
Living in the moment is what Facebook Live is all about. It creates more engagement than normal video. According to Facebook, users watch Facebook Live videos three times longer than videos that aren’t posted live.
And the best part? It’s simple to use! It’s a great way to personally connect with your followers and to reach new audiences. You can show your followers exclusive content, how-to videos, live events, and so much more.
What is Facebook Live?
Facebook Live is like having a TV camera in your pocket that allows you to broadcast in real-time to your followers’. With so many ads and posts competing on Facebook, it can seem hard to get your business’ point across. Live video gives business owners a chance to show off their personality and let their brand shine. Live video engages audiences through a raw, authentic look into your business.
Your audience can comment or react to your video in real time. Your Live video is also saved and posted to your timeline. Followers who were unable to tune in live to watch it can view it at a later time.
How to broadcast on Facebook Live Video
Before you go live, let’s learn how to get there. Follow this step-by-step guide to go live from your Facebook page on your computer. Follow similar steps for going Live on your mobile phone.
Step 1: From your page, select the option to write a post and then select the “Live Video” option.

Step 2: Allow Facebook to access your camera and microphone.


These prompts will go away after your first use.
Step 3: Choose your Privacy Setting.

There are three basic options when choosing a privacy setting for your video: Public, Friends, and Friends except. If the post is for your business, you will want to make sure the privacy setting “Public” is selected.
Want to practice going live? Follow the same steps from your personal page and select the “Only me” option. The “Only Me” setting will only let you access and view the video, giving you the chance to rehearse the video and steps before going live from your business page.
Step 4: Write a significant description.

Your broadcast description will show up like a status above your video in your followers’ Newsfeed. Grabbing the audience’s attention is the best way to get more views and reach a large demographic.
Step 5: Tag friends, show your location, add an activity, etc.


Choose the icons at the bottom of the screen to show what friends are in the video, where you are at, and what you’re are doing. Each of these are completely optional, but add more personalization and information to your post.
Step 6: Choose your camera view.

Before going live, make sure the camera is pointed in the direction you want it to be shot in. Simply click the rotating arrows icon in the right corner of your screen to change the camera view.
Step 7: Add lenses, filters, or writing and drawing to your video.
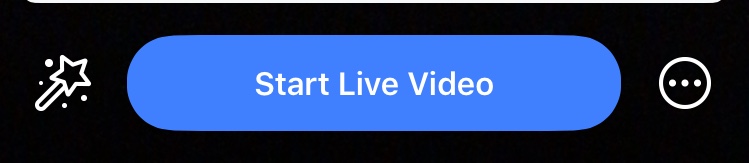
The wand icon in the right corner of your screen allows you to add several different features to your video such as adding lenses to your face, changing the filter on your camera, and writing or drawing to add illustration to your video.
Step 8: Click the “Start Live Video” and start broadcasting.
Now you’re ready to go! Once you click the button, Facebook gives a countdown of 3…2…1 and you’re live. Once you are streaming, your video will show up in your personal Newsfeed and others’ too, just like a normal post. Live videos can be up to 90 minutes long.
Step 9: Interact and recognize viewers and commenters.
To keep your audience engaged, interact with your viewers and commenters by giving them shout outs or encouraging them to ask questions. The more interaction you have on your video, the higher the ranking will be. A high ranking score moves your video up in your followers’ Newsfeed.
Where will you see the comments? The comments will show up on the bottom of your screen in reverse chronological order.
Step 10: Click “Finish” to end your Live Video.
Step 11: Post your reply and save your video to your camera roll.
Once you are all finished with your first Live video, a screen will pop up that allows you to post your video showing others who couldn’t tune in to see your video at a later time. This step is completely up to you. If you so choose, you can click the download button and keep your video on your personal device for future reference.
Now that you’ve got it down, here are our Top Five Tips to polish your Facebook Live.
Tip #1: Test your equipment
Technical errors can be embarrassing especially since you are live. However, they are easily avoidable by testing everything out before you get started. Check your lighting, ensure your microphone is working properly, and use the “Only Me” privacy setting to test your video before going live publically.
Pro-Tip: Instead of holding your mobile device in your hand while shooting try using a tripod to ensure a steady shot.
Tip #2: It doesn’t have to be perfect
A huge part of Facebook Live is to showcase a raw, authentic view of your business. In order to show this, don’t focus on perfection or worry about little mistakes. Embrace mishaps that may happen along the way or questions you weren’t anticipating from viewers.
Pro-Tip: This tip is extremely important if millennials are your target audience. In fact, only 6% of this age group trusts traditional advertising.
Tip #3: Schedule a “Go Live” notification
A “Go Live” notification is an easy way to alert followers you are broadcasting. This will encourage them to tune-in and engage with your business.
In your video settings, recognized by the three dots to the right of your “Start Live Video” button, there is a toggle switch that needs to be turned to on to use this feature.
Pro-Tip: Once you’ve turned on this notification, your followers can subscribe to your channel. After they are subscribed they will receive a push notification every time you begin broadcasting.
Tip #4: Reintroduce what you are talking about during your video
Have you ever walked into something late and are completely confused about what is going on? Make sure your Facebook Live doesn’t feel that way to followers who join late. It is important to restate your name, your brand, and what the point of the video is several times.
Pro-Tip: Give buffer time at the beginning of your video so that your audience has time to join.
Tip #5: Re-Purpose content for future posts
When planning a Facebook Live or event, think about how you can reference it in future posts. Does it relate to an old social media post or blog? Tie that into your video as well.
Pro-Tip: Make a social media calendar of events to reference for this purpose. Brainstorm ideas off old ideas and listen to your followers’ requests for more information on a certain topic.
Go Live!
Now that you’ve read the step-by-step guide and additional tips to making your own Facebook Live, it’s your turn to try it and engage with your followers. Show them the personality of your business and why you truly shine above the rest.