
Are you looking for a quiz creator that is free, interactive, and will engage your audience? Well, look no more, the Center has done a little research and found the perfect quiz creator. Surprisingly enough it is called, QuizWorks.
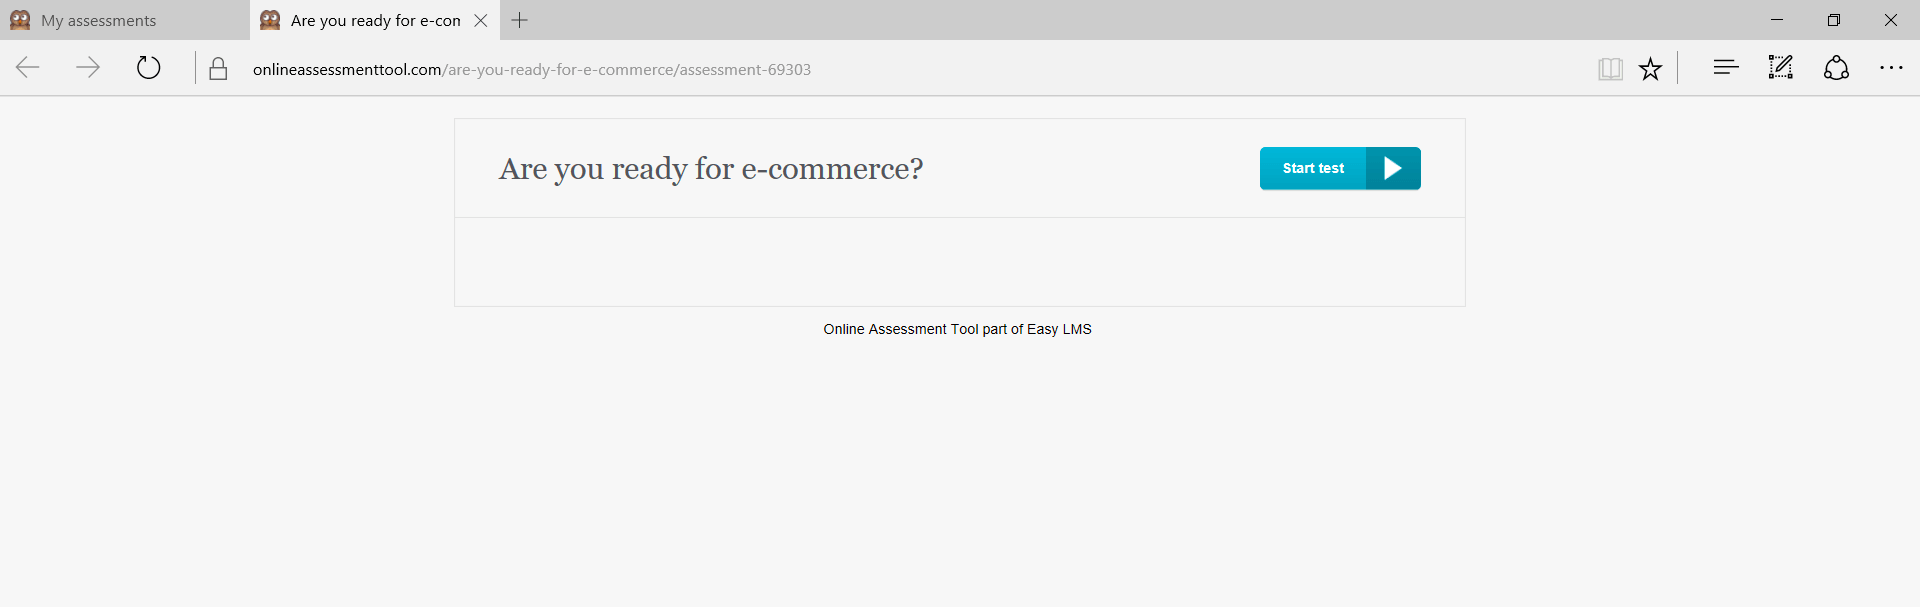
For the Center, I made an assessment quiz called ‘Are you ready for E-Commerce’. We previously had a blog that talked about e-commerce and the benefit of it (read here).
Before you begin making your own quiz, I encourage you to take this assessment to see if you are ready for e-commerce and get a feel for the tool you are about to use! Knock two birds out with one stone!
Once you have looked at our example and are ready to make the plunge to create your own quiz we have you covered. Here are the steps you should follow to make a great quiz!
Follow these 12 simple steps and you will be ready to publish a quiz of your own.
Step 1. Go to QuizWorks website at https://www.onlineassessmenttool.com.
Step 2. Begin making an assessment in two different ways, make an account or begin with making your quiz.
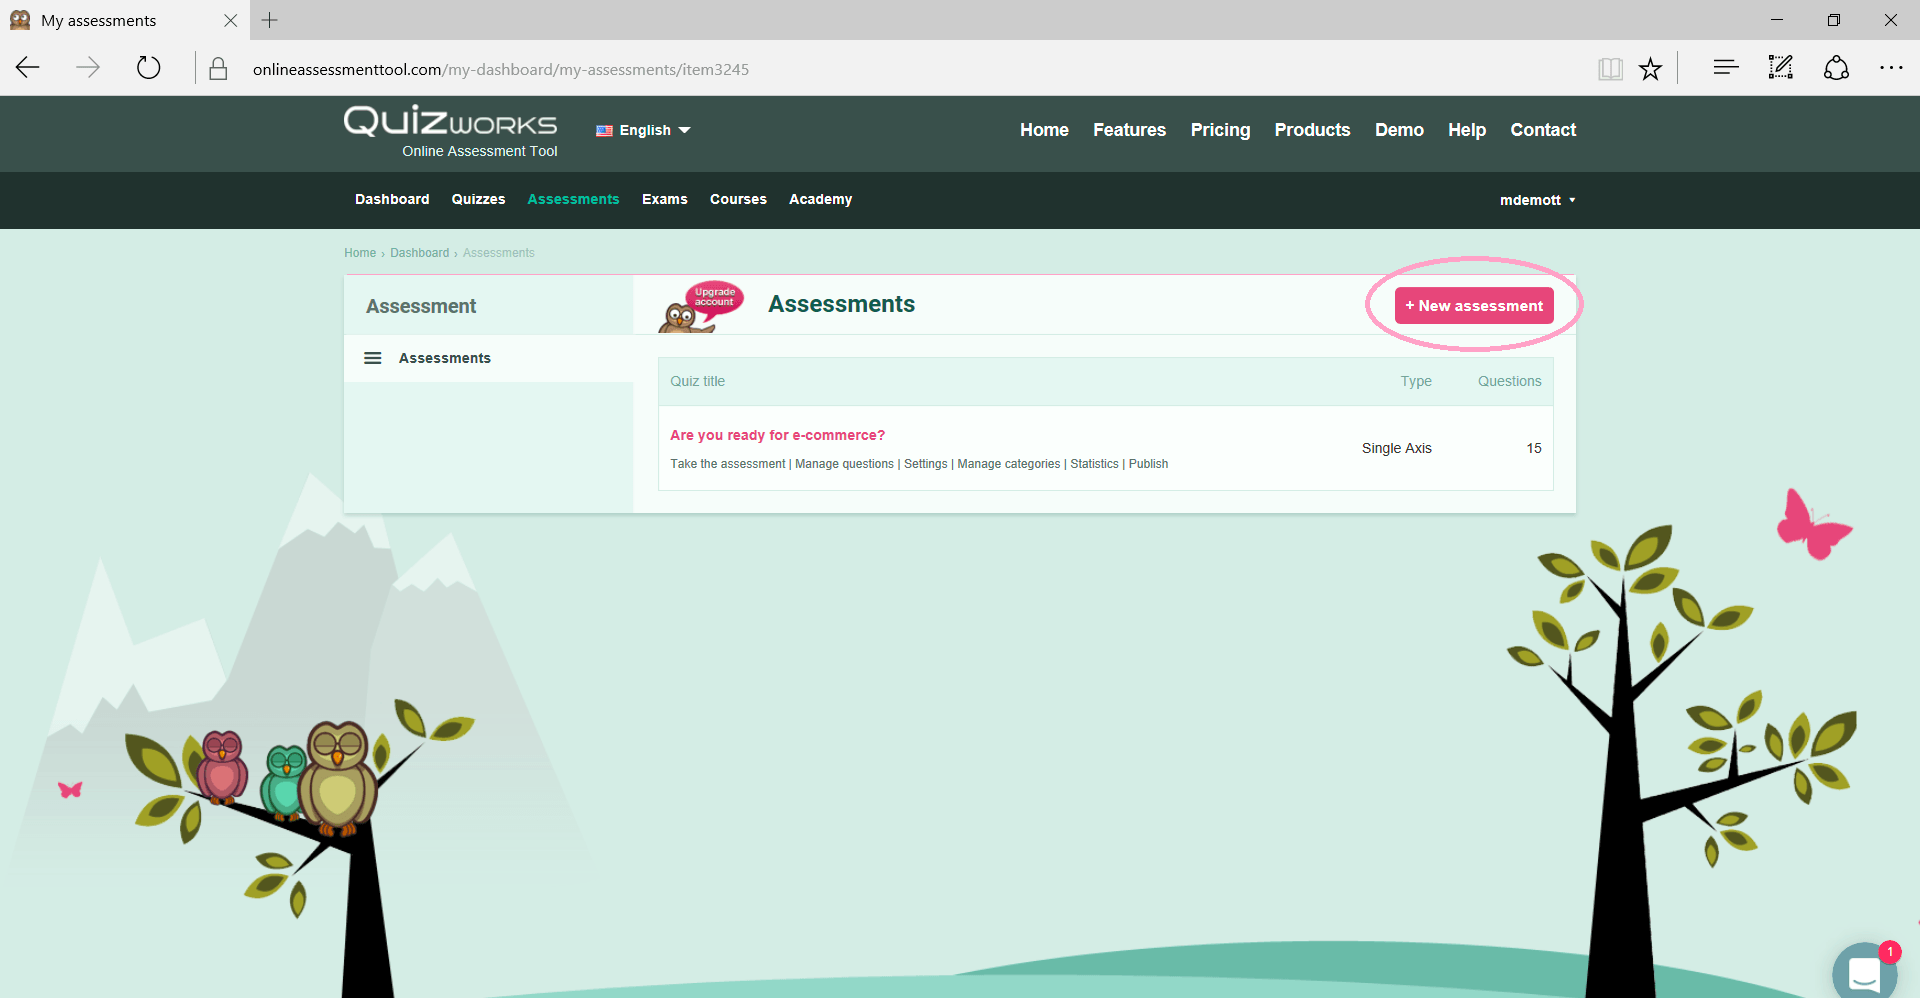
Step 3. The site will prompt you to title your quiz right away, but it doesn’t allow you to pick how your results will be shown. So, instead go up to the top of the page and click “assessments”. This will take you to your dashboard where you can begin. QuizWorks has four options for quizzes and you can choose which suits you and your goal best. Your four choices are a “gamified quiz”, “exam”, an “assessment”, and a “course”. Each of these quizzes have different goals and each explains what its purpose is.

Step 4. Click “New Assessment” and it will prompt you to create a title and then click “New Assessment” again.
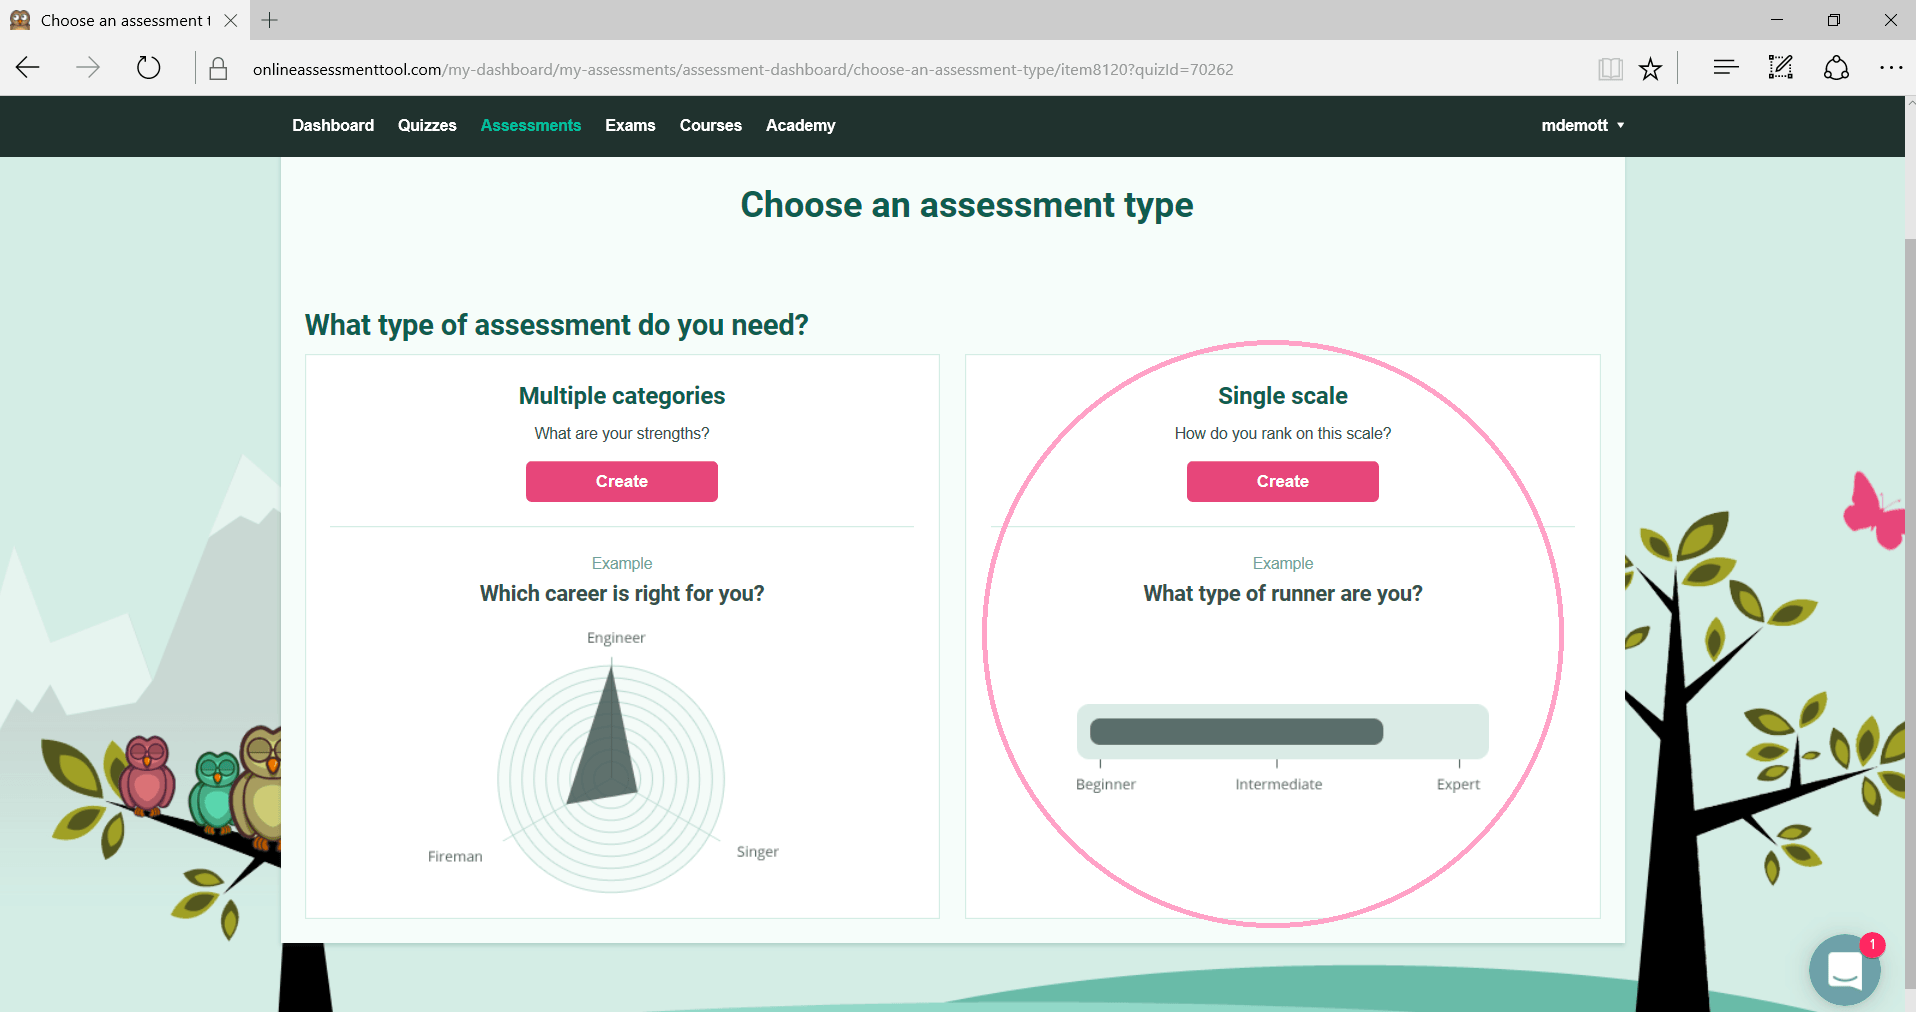
Step 5. After you have a title, now you will want to pick whether you want “multiple categories” or a “single scale”. Under your assessment title, click “settings” and it will allow you pick. I continued on with the “single scale” option. That is the best for a yes and no type of quiz.
- Adding questions is the same for the single scale and multiple category options. They differ in the categories section.
Step 6. Now you are ready to add the questions to your assessment. The free version only allows 15 questions, so unless you are wanting to get out your wallet you will want to keep your quiz to this minimum.
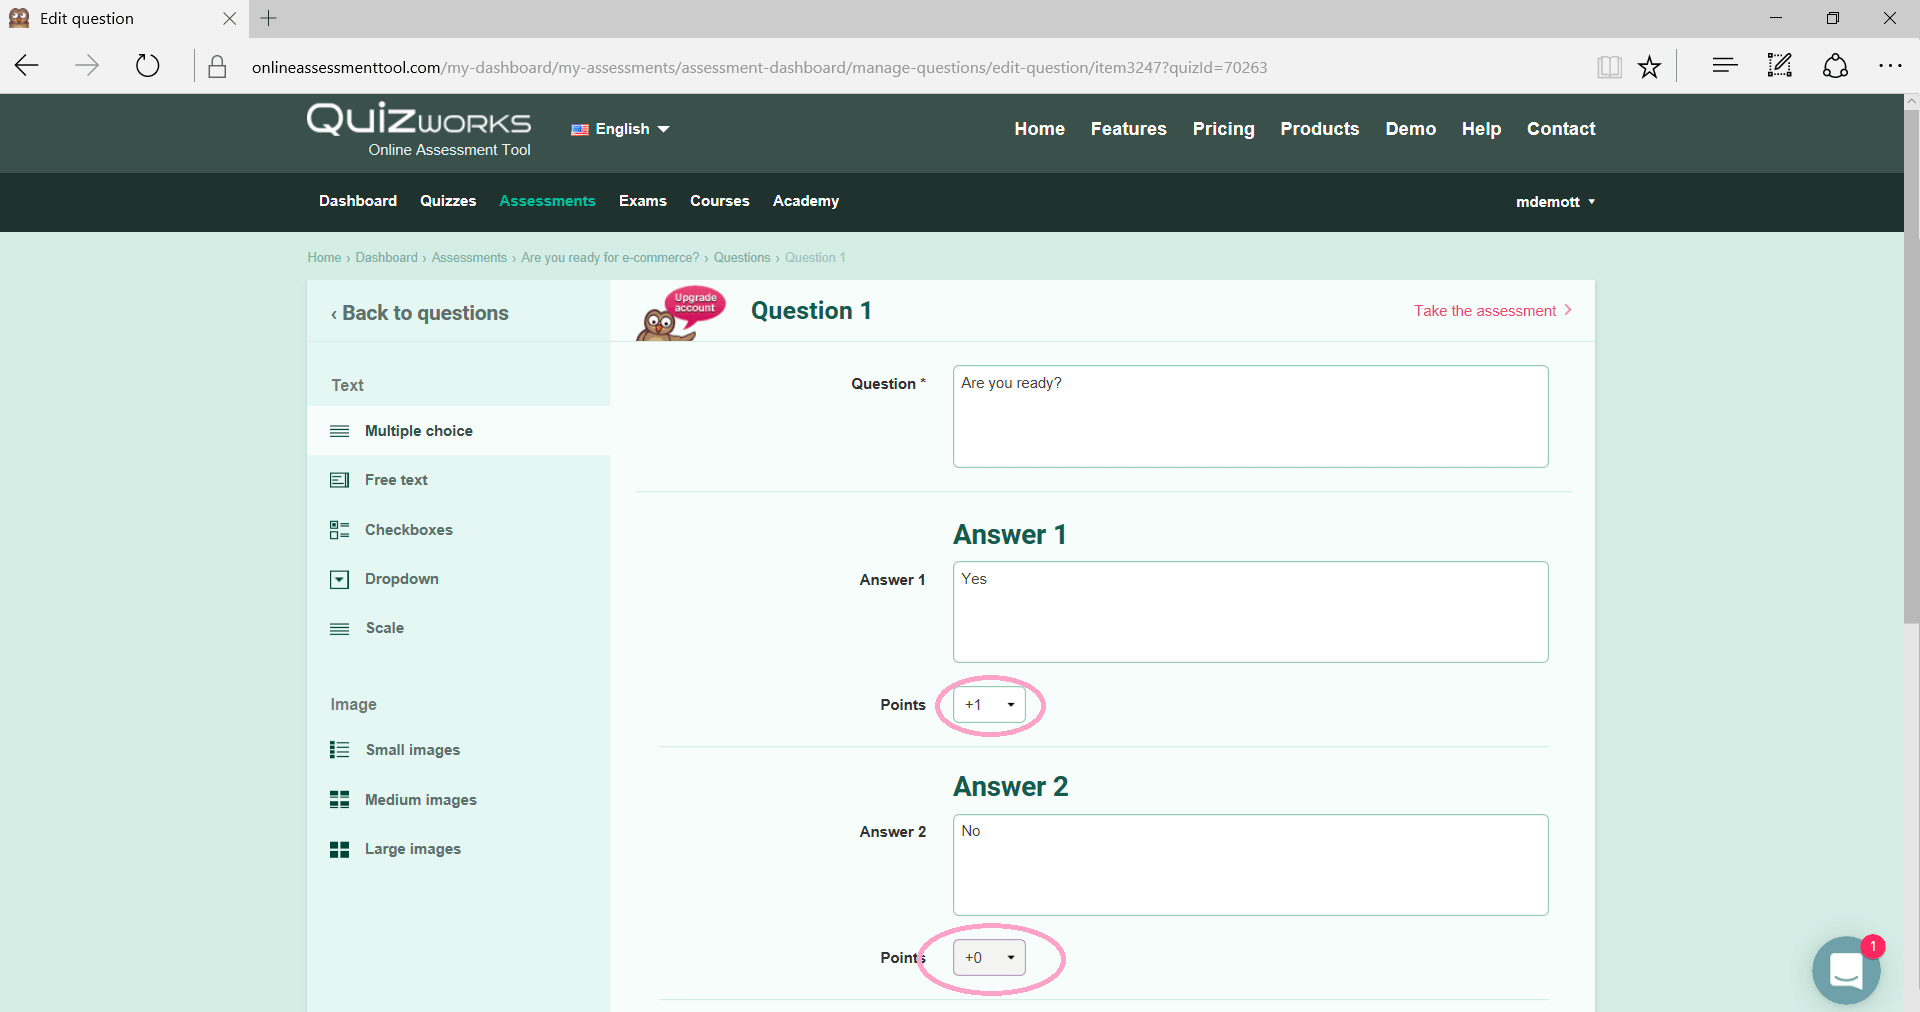
Step 7. Now, add your first question and the answers. You will see under each answer you can add points for each answer. I will address that in #9.
Step 8. Add all your questions and their answers.
Step 9. Let’s talk points! The points link to your categories for the quiz. So, for the correct answer you will want to put a point value to that (I recommend +1) and the wrong or other answers you will want to put a value of zero. This part is very important because this is how the quiz generates results. So, I’ll use my yes or no quiz as an example. I wanted the quiz to put a person in a category based on the number of yes’s they selected. Because of this, yes is technically the correct answer so on each yes for each question I made them have a +1 point value. On each no, I placed a zero point value on it. If you make it a negative value it will cancel out the yes’s that the person selected.
Step 10. Once you have all your questions, answers, and point values finished you are ready to add your categories. Also, this site allows you to change your questions to multiple choice, free text, check boxes, dropdown, and scale. I chose the check boxes option for this quiz.
Step 11. Go back to your dashboard and click on manage categories. This is where I added four categories that correlate to my quiz. You can have as many categories as you wish. With each category, you also need to add points. So, I had a 15 question and 15 point quiz so I broke down my categories by points. I broke them down like so:
Thoroughbred 15 – 12
Goat 11 – 8
Dairy Cow 7 – 4
Don’t Chicken Out 3 – 0.

These numbers come into play in the categories because it will ask you to provide the maximum amount of points to still fall into this category. For each of my categories, it would be 15, 11, 7, and 3.
Step 12: You’re finished! Make sure to save your work and then test out your assessment to make sure it works correctly and it error free. You can find the Take the Assessment link in a few different places. One place is on your assessment dashboard and the second is on the assessments page under your quiz title.

Helpful Hints
- Want to delete your assessment? Click on settings under the quiz title on your dashboard and it will take to a screen where you can delete it.
- Can’t figure something out? No worries, the QuizWorks team is extremely helpful. I went back and forth with them and they are super prompt, timely, and supportive.
Tag the Center for Rural Enterprise Engagement on your Facebook post or comment below with your quiz link. Good luck and we cannot wait to see your quizzes!